
For vendors using Usakey
Set up the customer portal
Configure an OIDC connection, customer organizations, license users, and assignments so users can sign in with their company account.
Overview
With the customer portal, the people who use your software sign in with their company account (OIDC) and activate devices with the license assigned to them. You can grant and stop access per person without handing out license keys one by one. OIDC connections and the customer portal are available on the Team and Enterprise plans (1 OIDC connection on Team and 3 on Enterprise; you can add more with add-ons).
- 1. Create a customer organizationAdd the company your users belong to.
- 2. Register Usakey in the IdPAsk the customer to create an app for Usakey in their IdP (Microsoft Entra ID, Google, and so on).
- 3. Add an OIDC connectionEnter the IdP's details in Usakey.
- 4. Prepare a per-user licenseCreate a policy that counts people, and a license from it.
- 5. Add license users and assign the licenseAdd the people who use the software and assign the license to them.
- 6. Tell your users what to doSend the sign-in URL and the guide written for your users.
Owners and admins do the work on this page. For how to choose a setup (separating customer companies, adding users automatically at first sign-in, assigning by group, and so on), see the User operations guide.
Create a customer organization
-
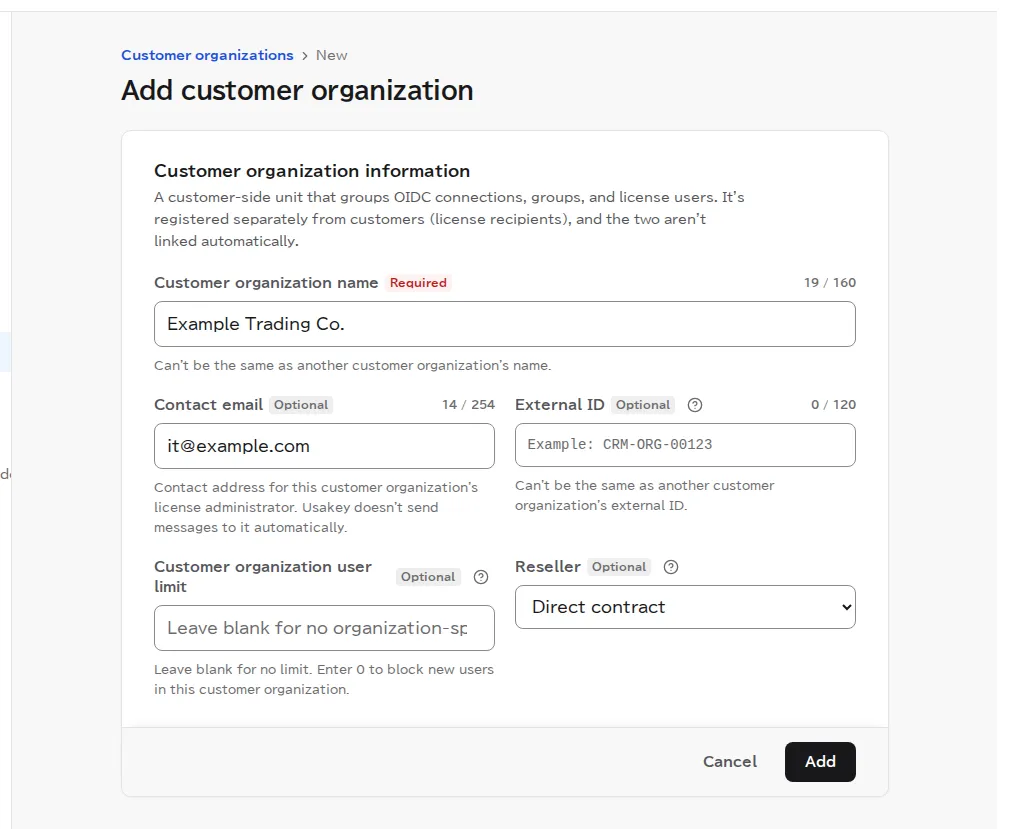
Step 1Add your users' company
Register Usakey in the IdP
Ask the administrator of the customer's IdP to register an app (client) for Usakey. The redirect URI must match the value below exactly. When they're done, get the Issuer, Client ID, and Client Secret from them.
Redirect URI
https://usakey.jp/portal/oidc/callbackFor the registration steps in each IdP, see Set up an OIDC connection in the User operations guide.
Add an OIDC connection
-
Step 2Enter the IdP's details
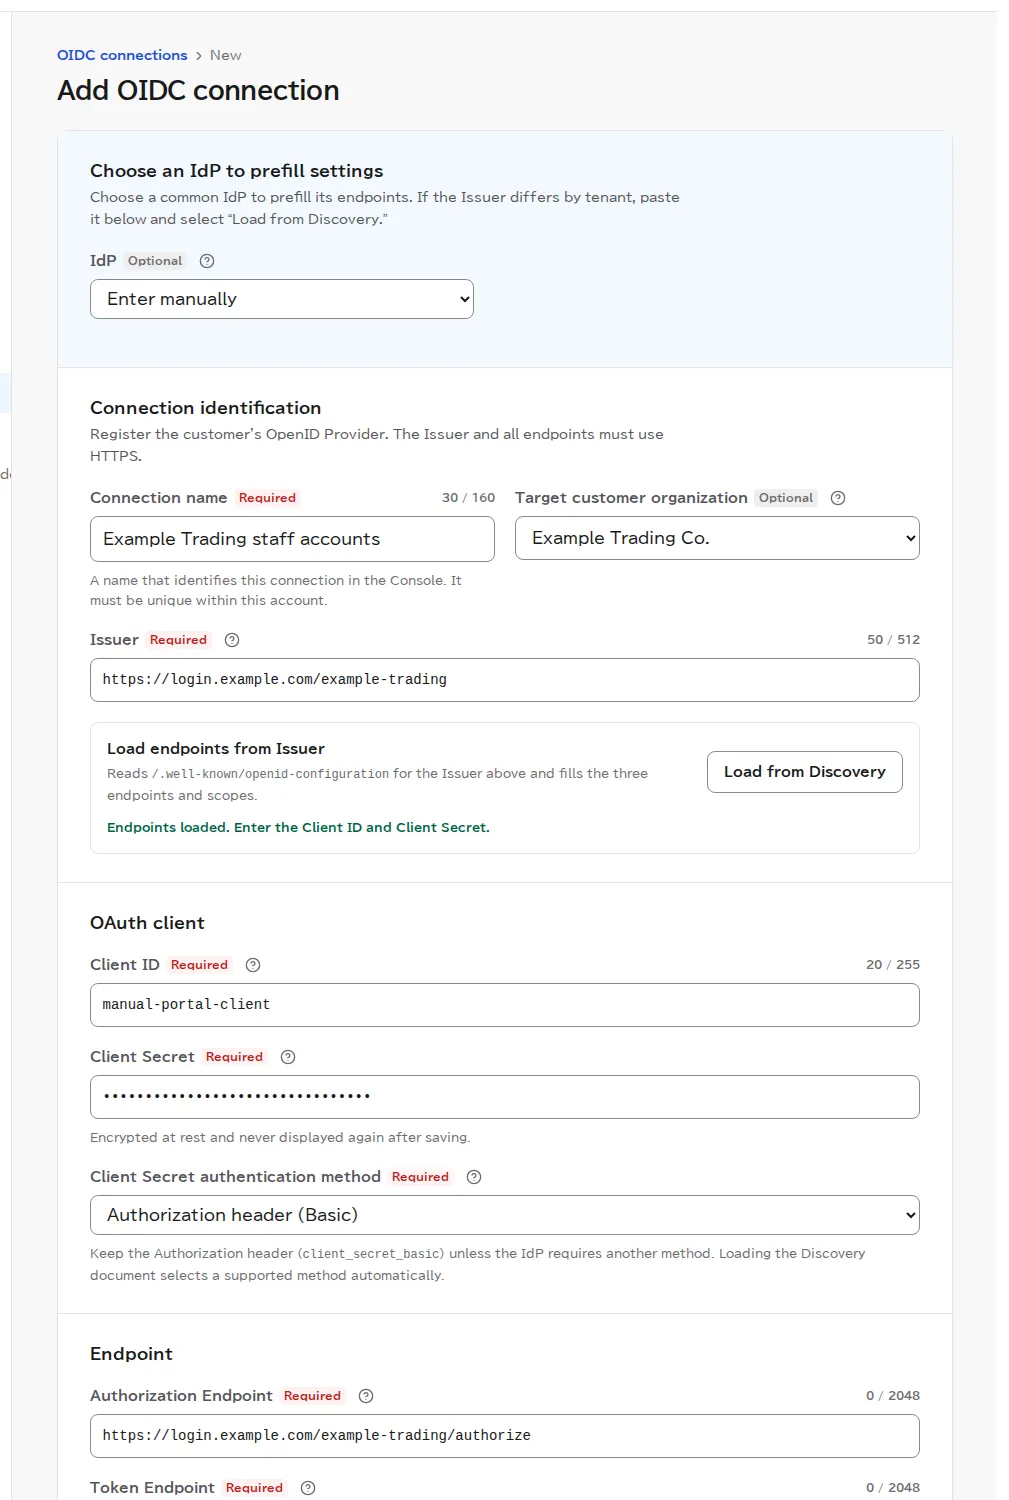
Open OIDC connections in the left menu and select Add OIDC connection. Enter a connection name, the customer organization, and the Issuer, then select Load from Discovery to fill in the endpoints. Enter the Client ID and Client Secret and select Add connection.
For common IdPs (Microsoft Entra ID, Google Workspace, Okta, and so on), choose it under IdP at the top to skip most of the typing. The Client Secret is stored encrypted and isn't shown again after you save it.
-
Step 3Find the connection ID for your users
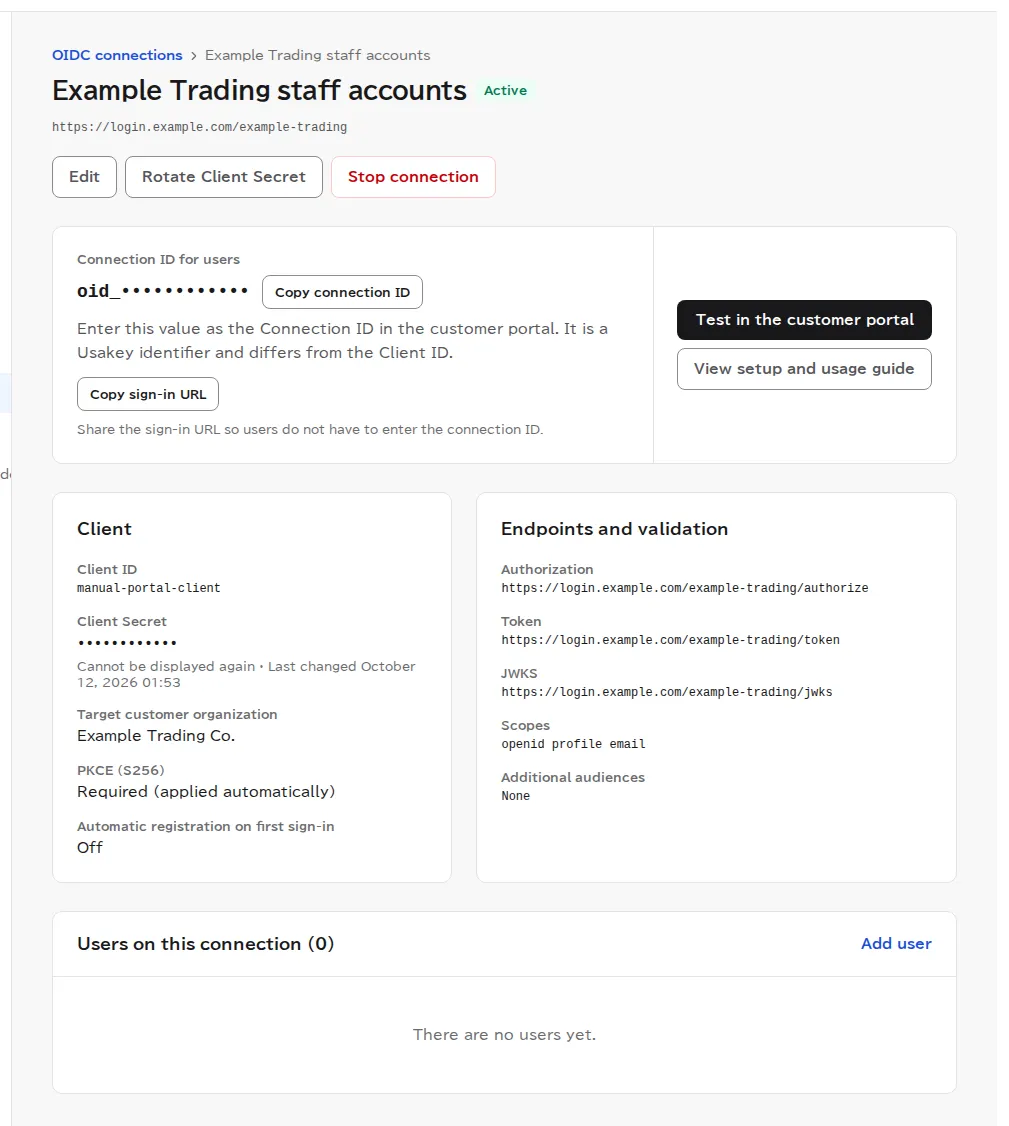
After you add it, the connection's details page opens. The Connection ID for users is the value your users use in the customer portal. Copy sign-in URL gives you a sign-in URL that includes the connection ID, so your users don't have to type it.
Select Test in the customer portal to check that signing in through the IdP actually works.
Prepare a per-user license
-
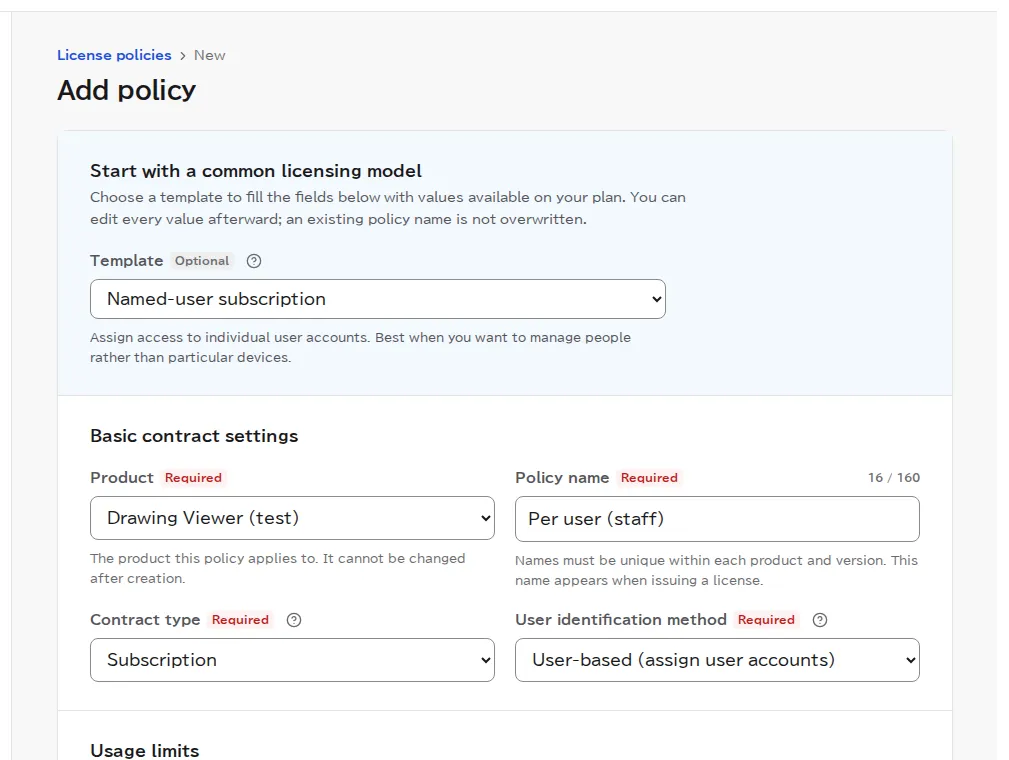
Step 4Create a per-user policy
-
Step 5Issue a license from that policy
Issue a license from the new policy, the same way as in Getting started. This license is the pool you assign from. Put its license key in your app's settings or give it to your users: your app activates a device by combining this key with the activation token the user creates in the customer portal.
Add license users
-
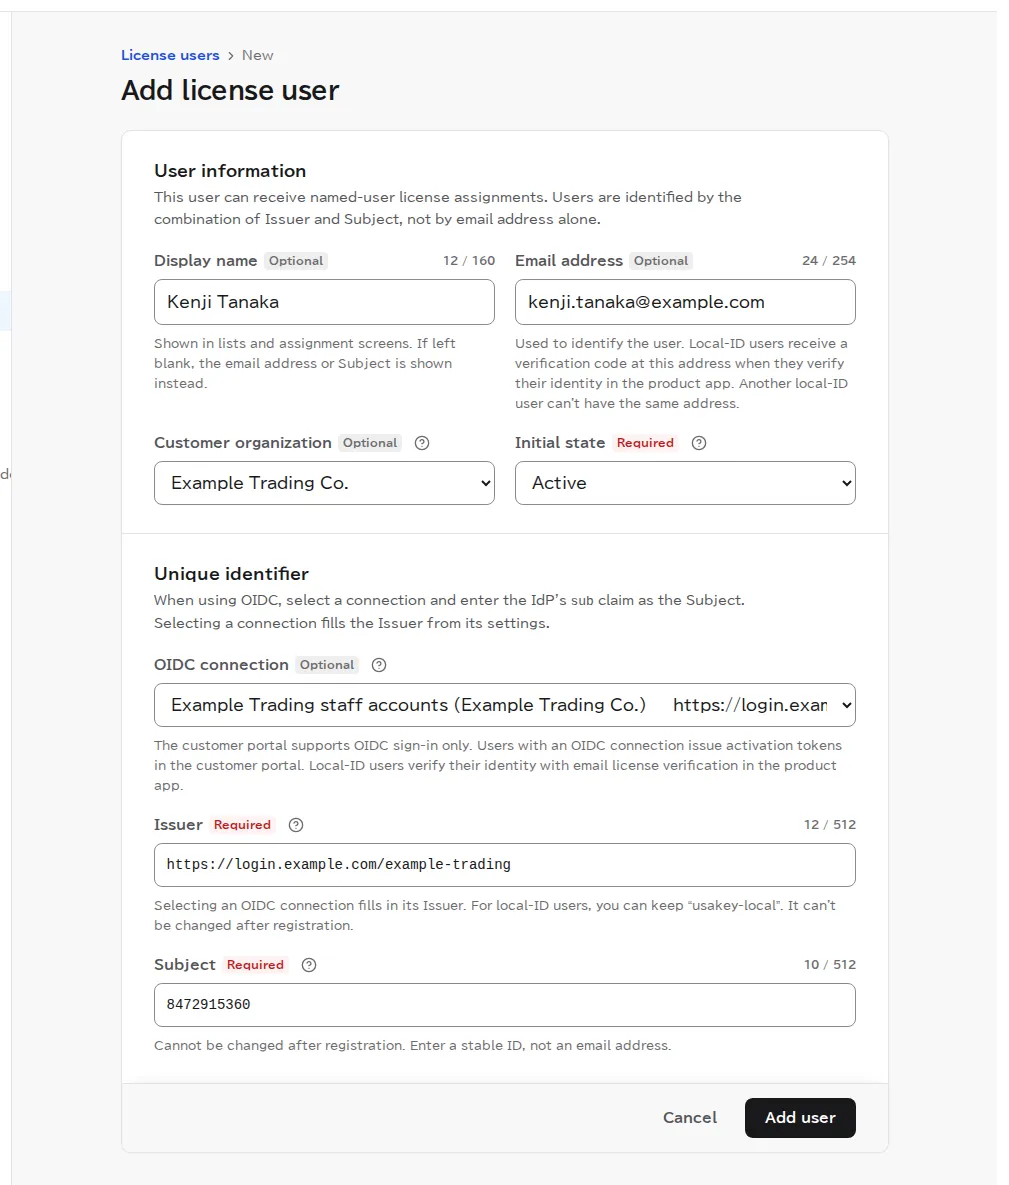
Step 6Add the people who use the software
Open License users in the left menu and select Add license user. Enter the name and email address, choose the customer organization and OIDC connection, enter the Subject (the permanent ID the IdP issues for each user), and select Add user. Get the Subject from the customer's IdP administrator.
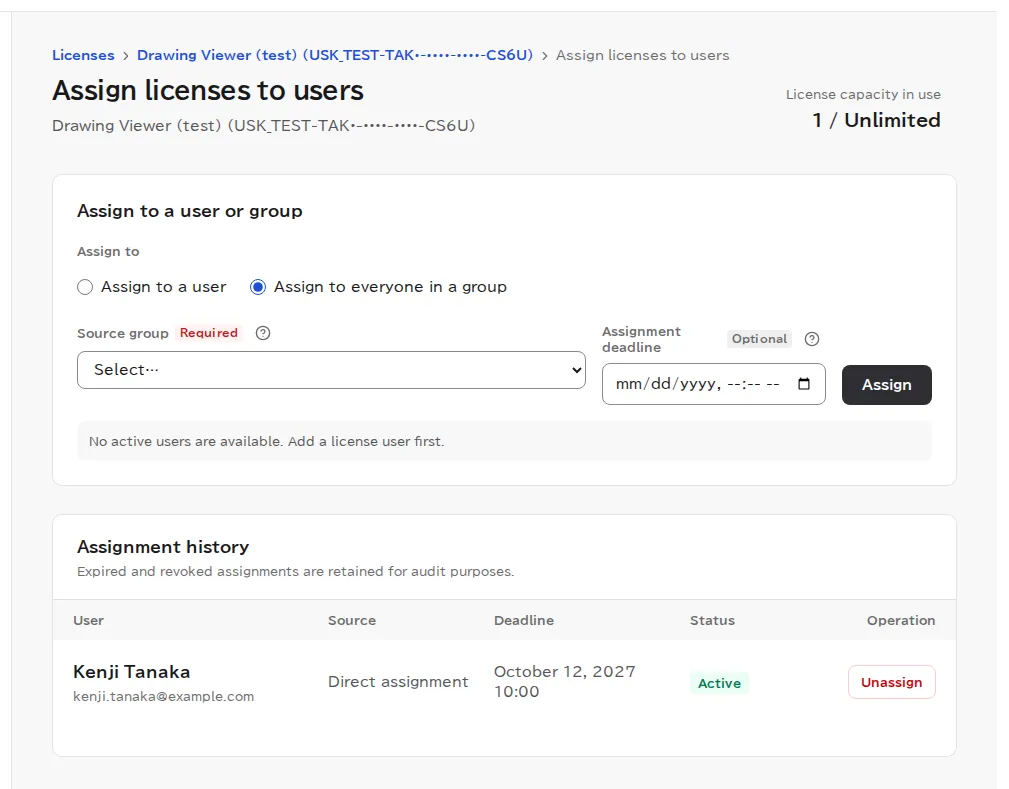
If you turn on automatic registration at first sign-in for the OIDC connection, users are added automatically the first time they sign in. In that case, assign the license after they're added.
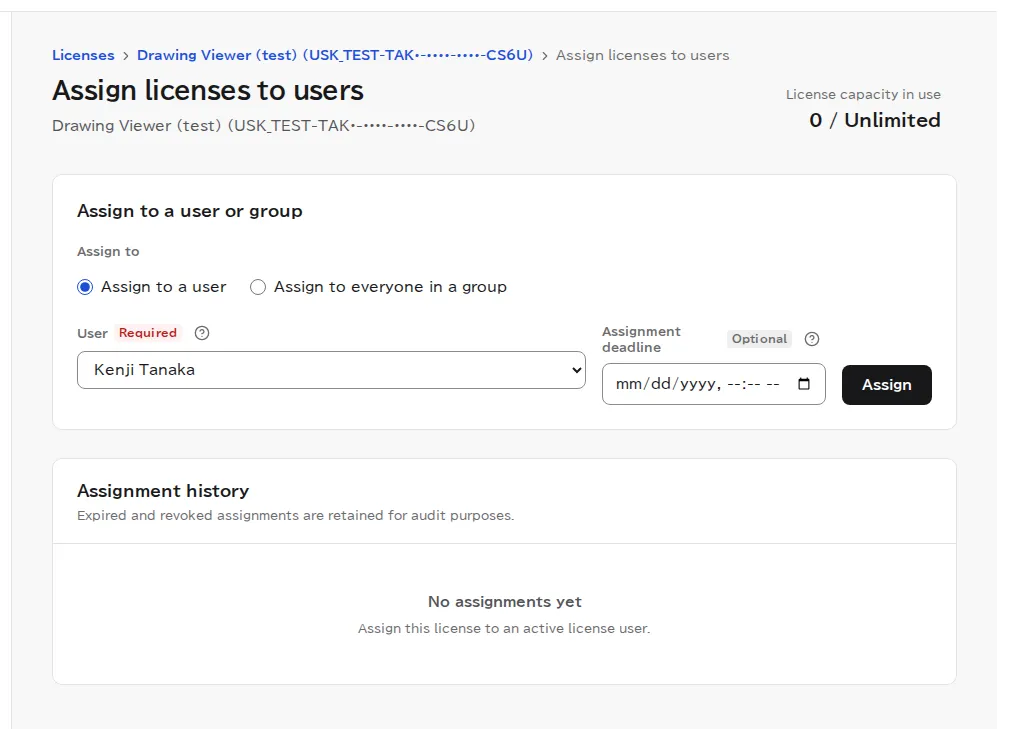
Assign the license
-
Step 7Choose the user on the license's assignment page
Tell your users what to do
Send your users these three things. The guide for users doesn't mention your company name or connection ID, so you can send its URL as is.
- The sign-in URL (from Copy sign-in URL on the OIDC connection's details page)
- The guide for users: https://usakey.jp/docs/manual/end-user/customer-portal?locale=en
- The license key, if your app asks for it
Sample message
How to start using Drawing Viewer

1. Open the URL below and sign in with your company account.
   (your sign-in URL here)
2. Set up two-factor authentication, then select "Issue a five-minute activation token".
3. Paste the activation token into Drawing Viewer's activation screen.

Step-by-step guide with screenshots: https://usakey.jp/docs/manual/end-user/customer-portal?locale=en
Selling through resellers
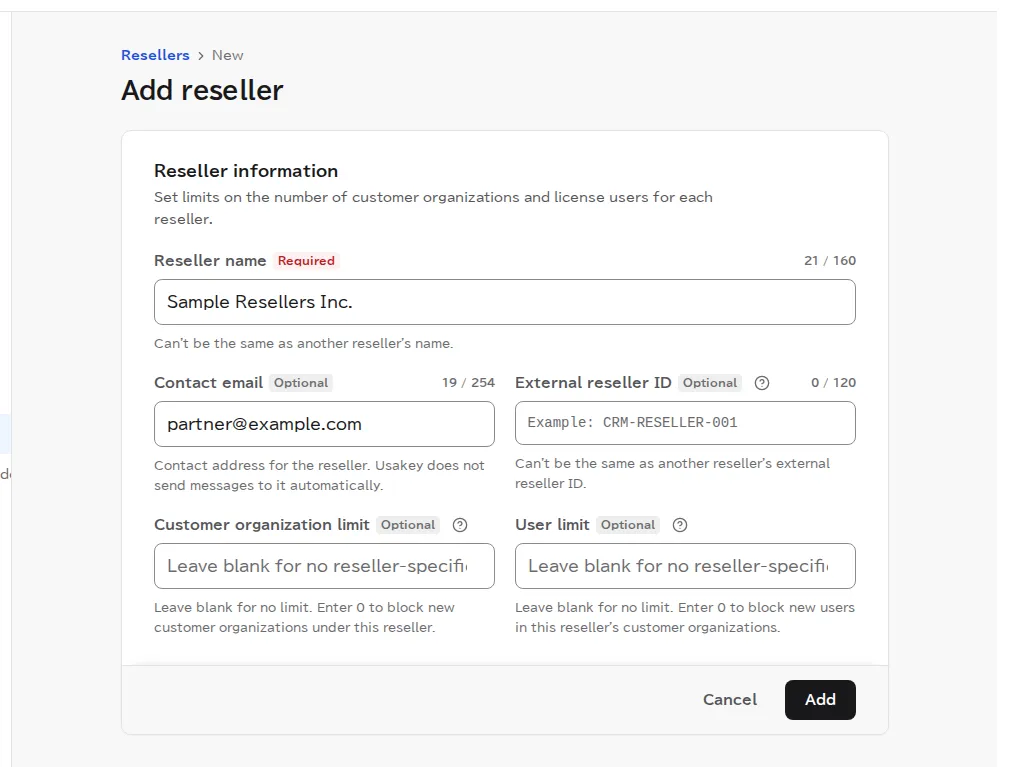
Resellers don't sign in to Usakey. You add each reseller yourself and link the customer organizations it handles. For each reseller, you can limit how many customer organizations and users it can have. You can add up to 5 resellers on the Team plan and 25 on the Enterprise plan (more with add-ons).
-
Step 8Add a reseller
Screenshots were taken in a test environment with sample data. IDs such as product IDs, license keys, and activation tokens are masked. Some details may change as we improve the screens.