
For vendors using Usakey
Add license checks to your app
Two ways to add licensing to your app: let an AI assistant do it through MCP, or add the SDK yourself.
Two ways to integrate
You'll add code to your app that activates a device with a license key and decides whether each feature can be used. Either way, the work is done by the official Usakey SDK: it creates keys on the device and verifies Usakey's signed responses.
| Aspect | Let an AI assistant do it | Add the SDK yourself |
|---|---|---|
| Best when | You use Claude Code or Codex and want it to handle everything from the code to the tests | You want to decide exactly where the checks go and how they look |
| What you need | An AI assistant that supports MCP | The SDK and a build environment for your app's language |
| Screens you use | AI assistant integration and the approval page in your browser | API/SDK |
Let an AI assistant do it
Usakey runs an MCP server for AI assistants (https://usakey.jp/mcp). Once you add it to your AI assistant and approve the connection in your browser, the assistant reads the Usakey skills (instructions written for AI) and integrates licensing into your app. You don't need an API key or Node.js.
-
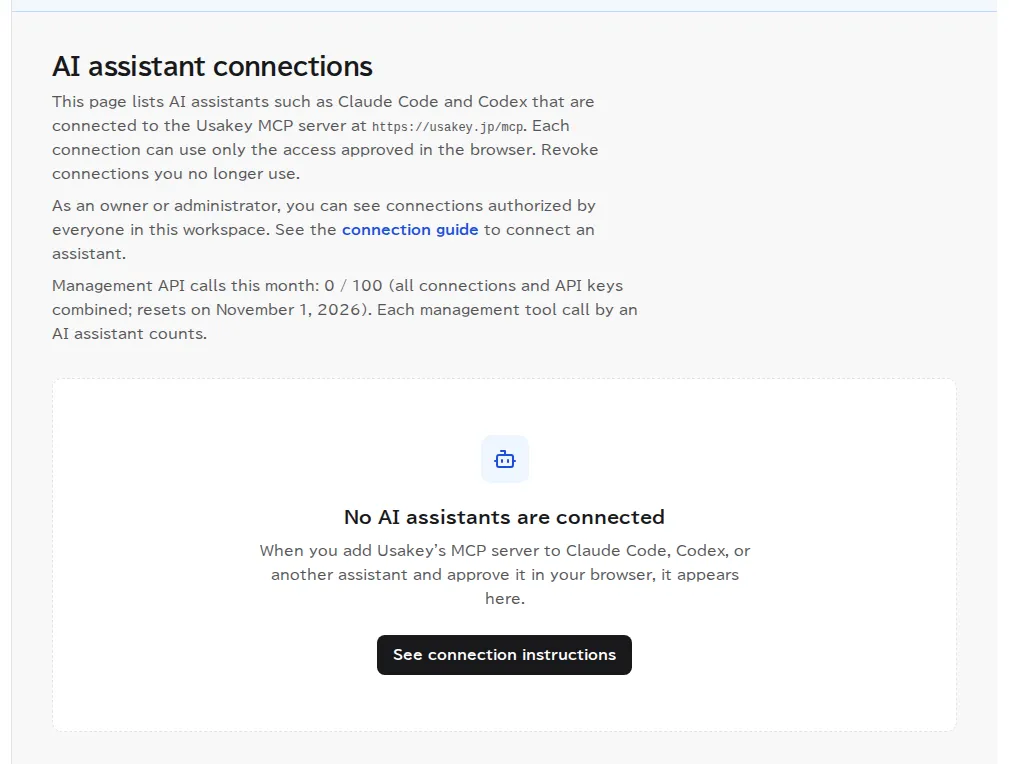
Step 1Open the connection instructions
-
Step 2Add the MCP server to your AI assistant
Paste the following prompt into an AI assistant that can run commands, such as Claude Code or Codex. The assistant adds the MCP server and explains how to sign in and approve access in your browser.
Add https://usakey.jp/mcp to this AI assistant as an HTTPS MCP server named usakey. Then explain how I can sign in to Usakey in my browser and approve the connection.When the assistant finishes adding it, your browser opens a Usakey page (in Claude Code, follow the assistant's instructions: open
/mcp, chooseusakey, and select "Authenticate").Instead of the prompt, run one of the following in your AI assistant.
- Claude Code
claude mcp add --transport http --scope user usakey https://usakey.jp/mcpIn Claude Code, open
/mcp, chooseusakey, and select "Authenticate" to open your browser.- ChatGPT (Codex)
codex mcp add usakey --url https://usakey.jp/mcpAdding the server starts the sign-in and opens your browser.
For other AI assistants, see Add the MCP server in the developer documentation.
-
Step 3Sign in and choose what to allow
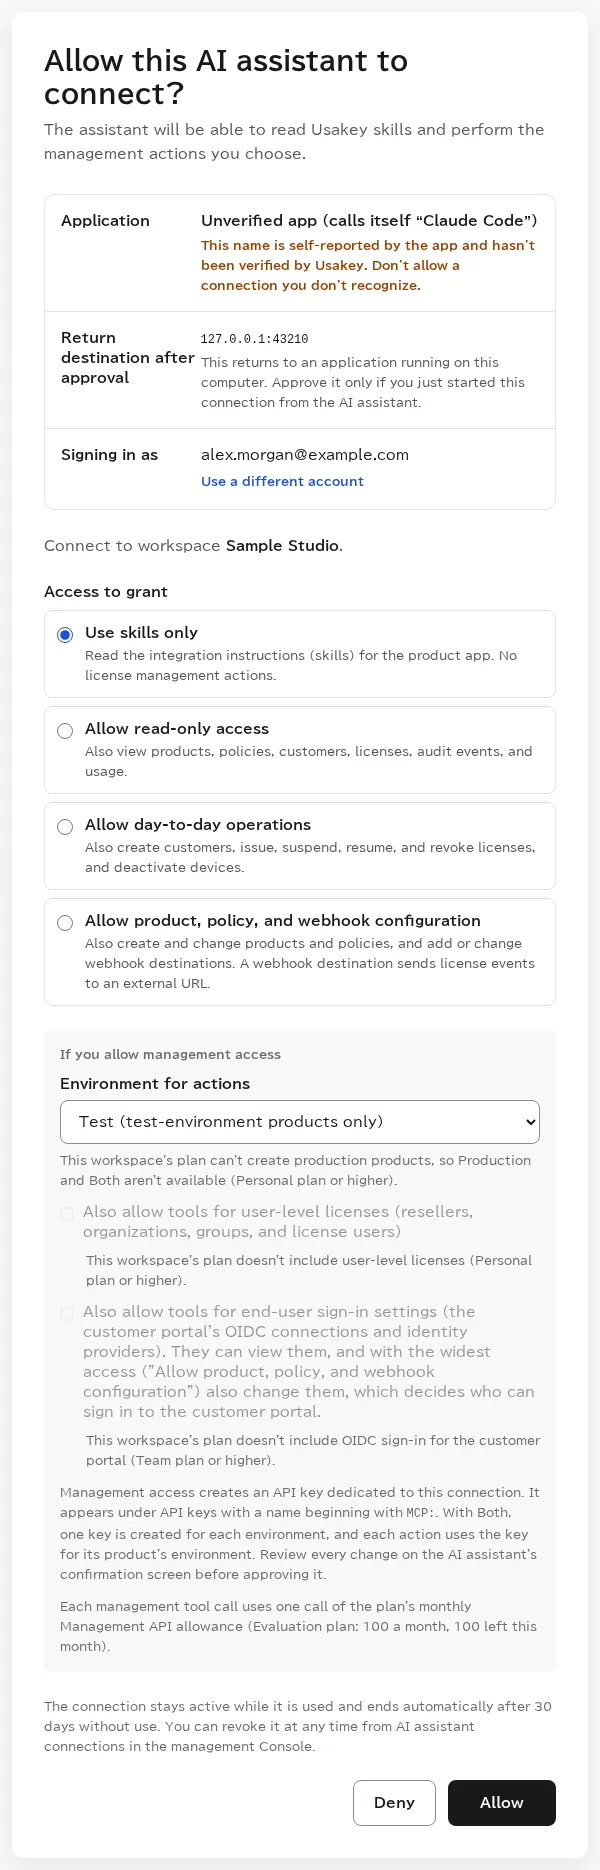
Your browser opens the Usakey approval page (or the sign-in page first, if you aren't signed in). Check the app that's asking to connect, the account you're approving with, and the Workspace. Then choose the Access to grant and select Allow.
- Use skills only: the assistant only reads the skills and can't change anything. This is enough for integration.
- Allow read-only access: the assistant can also look at products, licenses, the audit log, and so on.
- Allow day-to-day operations or higher: you can also ask it to issue or suspend licenses. Only owners and admins can choose this, and you also pick the Environment for actions.
Apps whose name Usakey can't verify are labeled as unverified, and Use skills only is selected by default. Don't approve a connection you don't recognize.
-
Step 4Check the connection and ask for the work
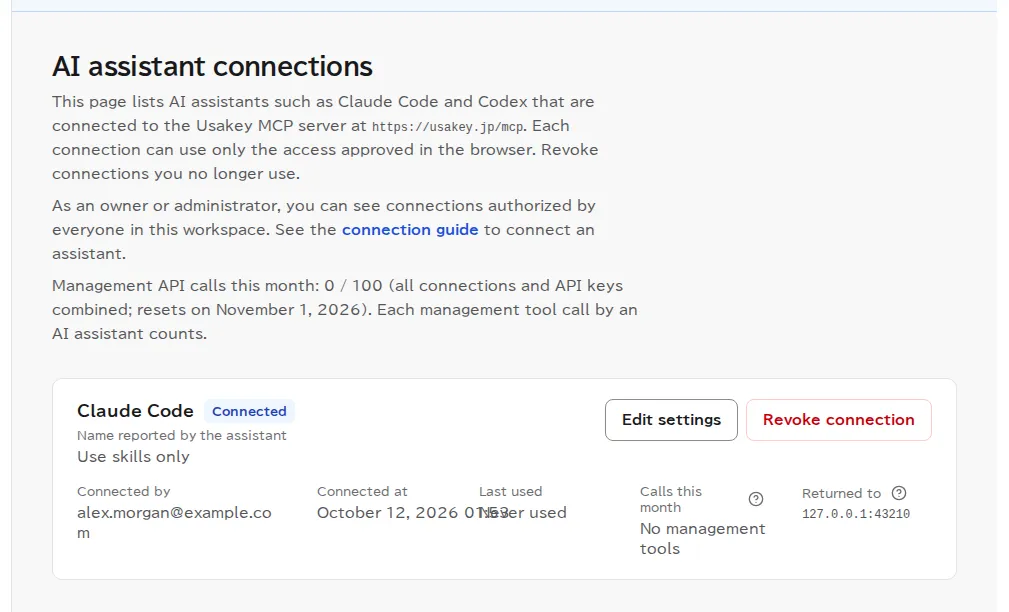
Approved connections appear on AI assistant integration in the console. Now just ask your AI assistant in plain language.
Use the Usakey MCP skill to build a simple clock app in Rust with GPUI, and add license activation and a license status display to it.To review or revoke connections, see Manage AI assistant connections.
Add the SDK yourself
-
Step 5Get the connection values and settings file
Open API/SDK in the left menu. Copy the connection values lists the values your app's settings need: the API URL, the product ID, and the Signature-verification public keys. None of them are secrets.
Select Download connection settings to save
usakey.config.json, which bundles these values with the public key your app trusts first. Put it in your product's repository, and the SDK starters and AI assistants can read it as is.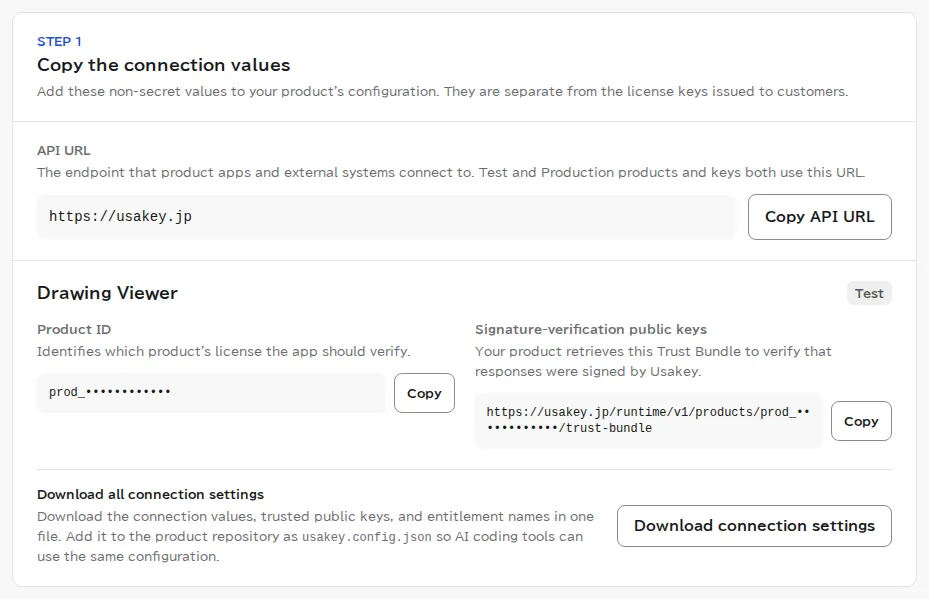
-
Step 6Download the SDK and starters
Under Integrate your product app, open the Implement it yourself with the SDK tab (the Ask your AI assistant to integrate licensing tab is open first), then under Use the official SDK select Download SDK. The SDK includes bindings for each language and integration starters for Node.js and Python (
starters). The starters already handle activation, periodic checks, per-feature decisions, deactivation, and the messages users see (in Japanese and English). Copy them into your product's source and adapt them.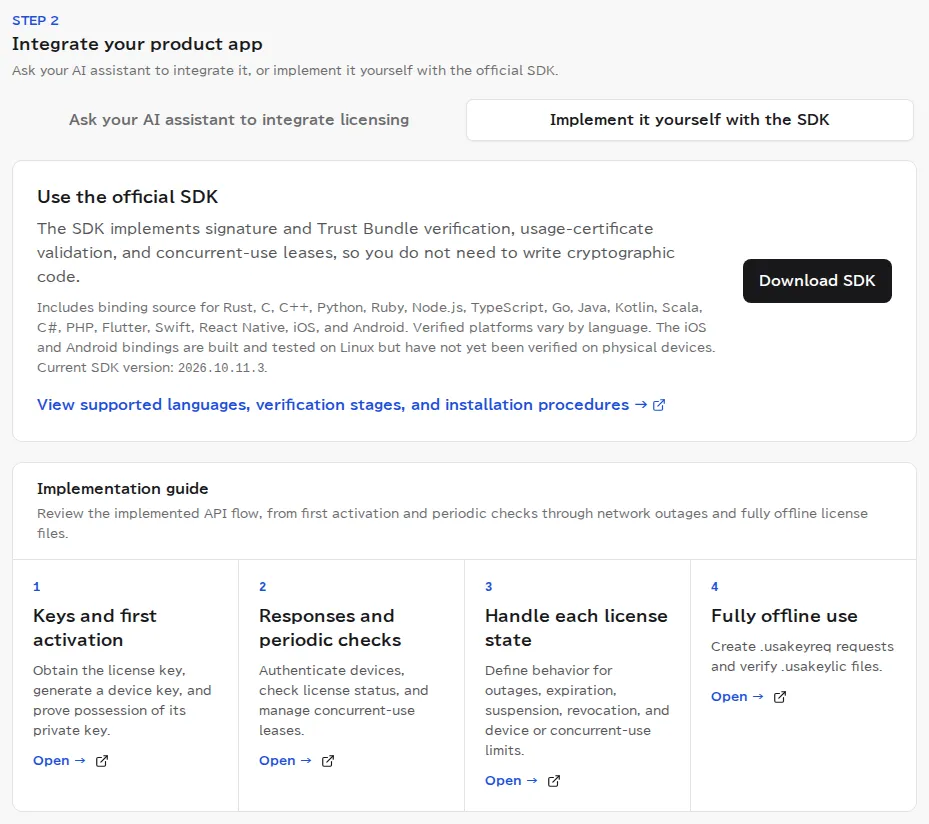
-
Step 7Check at every entry point of a feature
With the Python starter, the code looks like this.
export_pdfis the name you entered in the policy's Features and quantities passed to the product app (JSON) (see Getting started).license = LicenseManager( load_config(Path("usakey.config.json").read_text(encoding="utf-8")), create_open_client(), # uses the Python SDK FileStateStore(directory), FileKeyStore(directory), plan="developer", # your Usakey plan locale="en", ) license.activate(user_entered_key) # first time only; don't store the key license.check() # at startup and at scheduled times decision = license.require_feature("export_pdf") if not decision["allowed"]: show_message(decision["title"], decision["action"])- Make the decision at every entry point of the protected feature (buttons, menus, shortcuts, commands, and so on), not just in what the screen shows.
- Send status checks at the times the starter schedules. Checking every time the app starts quickly uses up the daily limit.
- The SDK trusts only Usakey's signed responses. License keys aren't stored on the device.
For the Node.js starter, other languages, and the API specification, see the SDK README and the developer documentation.
Browser app authentication and CORS
Use this setting when CORS restrictions prevent a product app running in a browser, such as a Godot or WASM app, from connecting directly to Usakey. Register the app's origins and enable access to activate devices and check licenses directly from the browser.
Open Products in the console, edit the product, then register the app's origins under "Browser license authentication" and enable access.
Enter the scheme, host, and port if needed from the URL that serves the app, such as "https://game.example.com". Do not include a path. You can register up to 20 HTTPS origins. Test products also accept local HTTP origins such as localhost.
Registered origins can activate devices and check licenses directly. Device signatures and response signature verification remain required. This setting does not apply to management pages or the Management API.
See the developer documentation for Godot and WASM transport requirements and configuration through MCP or the Management API. Browser authentication instructions
Test your integration
When the integration is done, activate a device with the license key you issued, then confirm that suspending the license stops your app and resuming it brings the app back. See Turn a license off and on.
Screenshots were taken in a test environment with sample data. IDs such as product IDs, license keys, and activation tokens are masked. Some details may change as we improve the screens.