
For vendors using Usakey
Set up email verification
Prepare license users and a per-user policy so that people can verify themselves with a code sent to their email address.
How it works
With a per-user license, a user enters their email address in your app and receives a 6-digit verification code at that address. Entering the code proves who they are, and the device is activated right away. You can grant and stop access per person without company accounts (OIDC) or the customer portal. Available on the Personal plan and above.
- A verification code works for 10 minutes, can be tried up to 5 times, and can only be used once.
- If the user has set up two-factor authentication, they also enter a code from their authenticator app, or an approval code shown after approving with their passkey.
- Codes are only sent to email addresses you added to your list, for users who have a license assigned. Addresses you haven't added get no email, but your app gets the same response either way, so it can't tell whether an address is registered.
Prepare a per-user license
-
Step 1Create a per-user policy and license
As with the customer portal, create a per-user policy and issue a license from it to assign from (see Set up the customer portal). The policy page shows the verification methods and whether your current plan includes them.
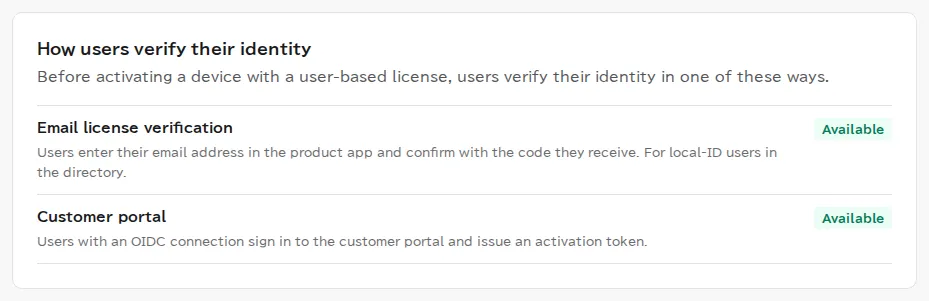
Add users to your list and assign the license
-
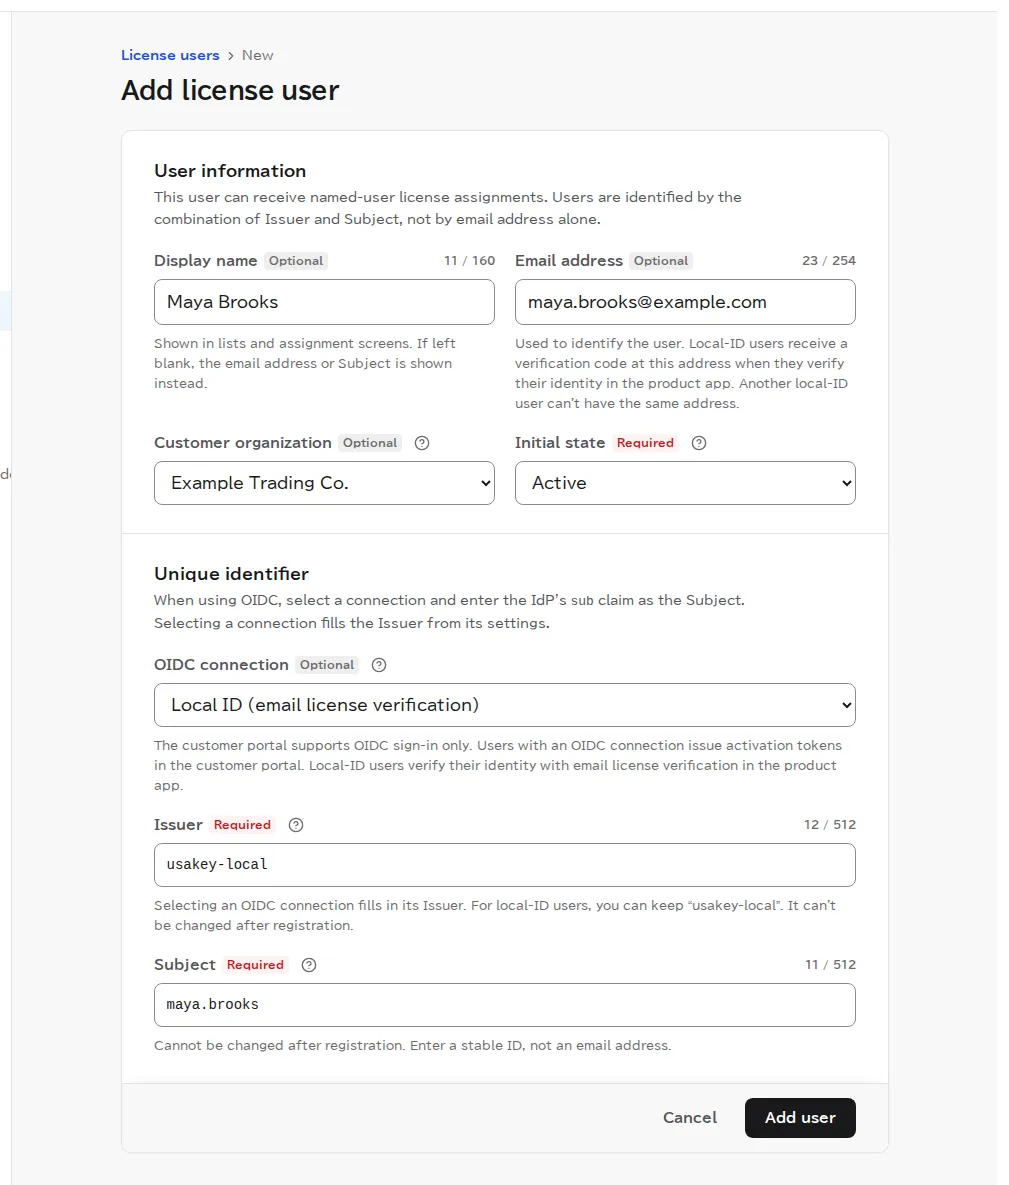
Step 2Add a license user with an email address
-
Step 3Assign the license
On the per-user license's assignment page, assign it to the user you added (the same steps as in Set up the customer portal).
Check that it's ready
-
Step 4Check the license user's details
The license user's details page shows whether email verification can be used, and if not, why and how to fix it (no email address, another user with the same address, suspended, not included in your plan, and so on).
To require two-factor authentication from a user, set it up on this page. We recommend a passkey, which works as follows. No change to the product app or the SDK is needed.
- Ask to set up a passkey emails the user a setup link (valid for 24 hours, one use).
- The user opens the link and registers a passkey.
- From then on, the verification code email links to a page where the user approves with the passkey.
- The user approves on that page and enters the approval code shown in the product app's “authenticator app code or recovery code” field.
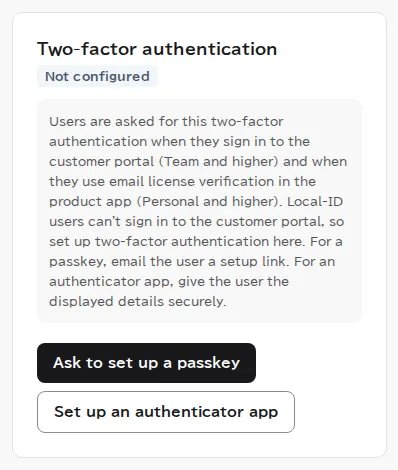
For an authenticator app, set it up on this page and give the user the displayed information securely. Users with an authenticator app enter its code in addition to the verification code.
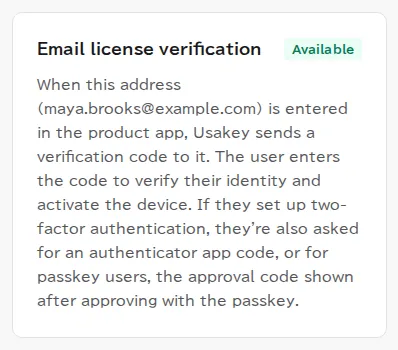
Your app and your users
Your app needs a screen to enter an email address and a screen to enter the verification code (and, when required, a field for the authenticator app code or recovery code, where passkey users enter their approval code). The app asks Usakey to send the code, has Usakey check the code the user enters, and receives the activation token used to activate the device. See the API reference for the specification. To have an AI assistant build it, follow the same steps as in Add license checks to your app.
You can send your users this page's URL as is: https://usakey.jp/docs/manual/end-user/email-verification?locale=en
Screenshots were taken in a test environment with sample data. IDs such as product IDs, license keys, and activation tokens are masked. Some details may change as we improve the screens.