
For vendors using Usakey
Sell with Stripe
Get paid through your own Stripe account and have Usakey issue and suspend licenses based on payments.
How it works
You get paid for your software through your own Stripe account. Usakey never holds your money. Usakey receives payment notifications from Stripe and issues, suspends, resumes, or revokes licenses based on them. The Stripe integration is available on the Personal plan and above.
- When someone buys, a license is issued and the buyer can receive the license key.
- After that, licenses are suspended, resumed, or revoked based on notifications about failed payments, completed payments, subscription changes, cancellations, and refunds. The developer documentation lists what each notification does.
- Owners and admins set this up.
Prepare Stripe
-
Step 1Open the setup steps
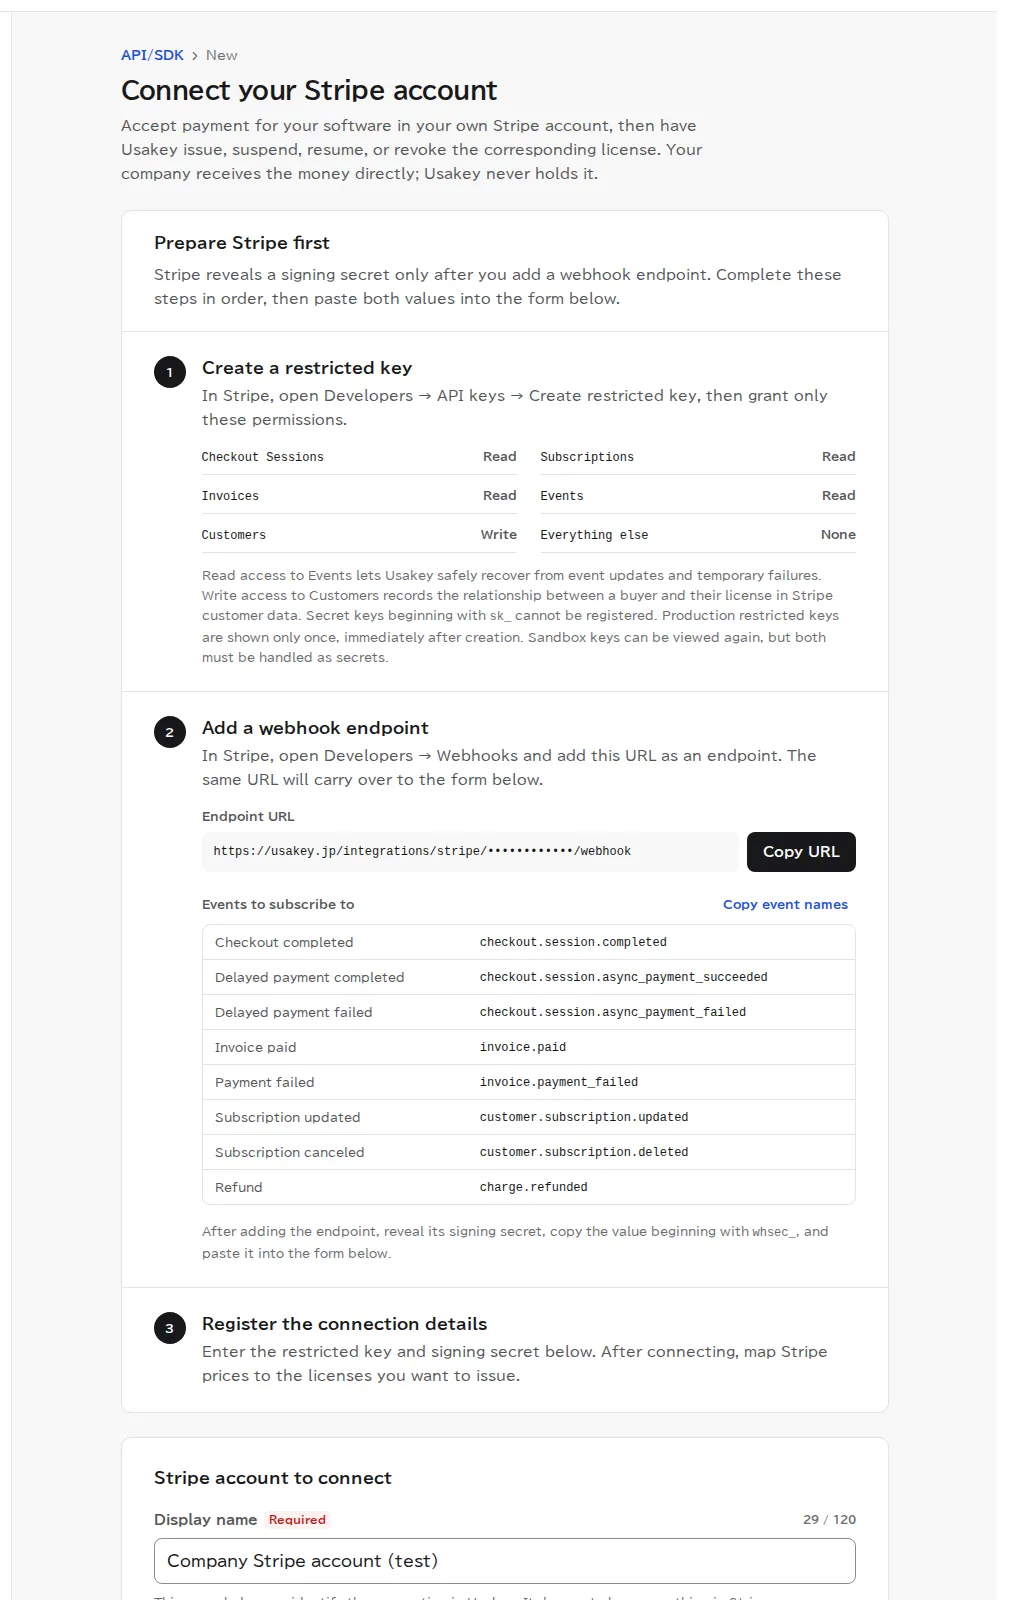
Open Stripe integration in the left menu to see Connect your Stripe account. Prepare Stripe first lists what to do in Stripe, in order.
- Create a restricted key: in Stripe, go to Developers, then API keys, and create a restricted key with only the permissions shown on the page. You can't register a secret key (one that starts with sk_).
- Add a webhook destination: register the destination URL and the events shown on the page (completed checkout, failed payment, cancellation, refund, and so on) in Stripe, then find the signing secret (a value that starts with whsec_).
Register the connection in Usakey
-
Step 2Enter the restricted key and signing secret
In the fields further down the same page, enter a display name, the Stripe mode (sandbox for testing, or live), the restricted key, and the signing secret, then register them. Try it first with a Stripe sandbox and a Usakey test-environment product, and switch to live once it works.
-
Step 3Match Stripe prices to the licenses you issue
After you register, choose for each Stripe price which product and policy the license is issued with. From then on, a purchase at that price issues the license you chose.
Add purchasing to your product
The purchase button and the code that hands the license key to the buyer go into your product. If you use an AI assistant, the Usakey Stripe integration skill can do this, including the implementation and tests for successful payments, failures, cancellations, and refunds (see connecting an AI assistant).
Use the Usakey MCP skill to add Stripe purchasing to this app, with the license key delivered to the buyer after purchase.If you build it yourself, see Issuing licenses on purchase in the developer documentation.
Screenshots were taken in a test environment with sample data. IDs such as product IDs, license keys, and activation tokens are masked. Some details may change as we improve the screens.