
For vendors using Usakey
Getting started
Sign up for Usakey and set up your first product, policy, and license. Every plan starts here.
What you'll set up
What you'll do
Sign up for Usakey and create the three things you need before adding licensing to your app: a product, a policy, and a license.
What you need
An email address that can receive mail. You don't need a payment method, because the Evaluation plan is free.
Evaluation plan limits
Up to 2 test-environment products, 4 managed licenses per month, and 5 devices. Licenses expire within 1 hour of issue, which is enough to test your integration.
Sign up
-
Step 1Fill in the sign-up form
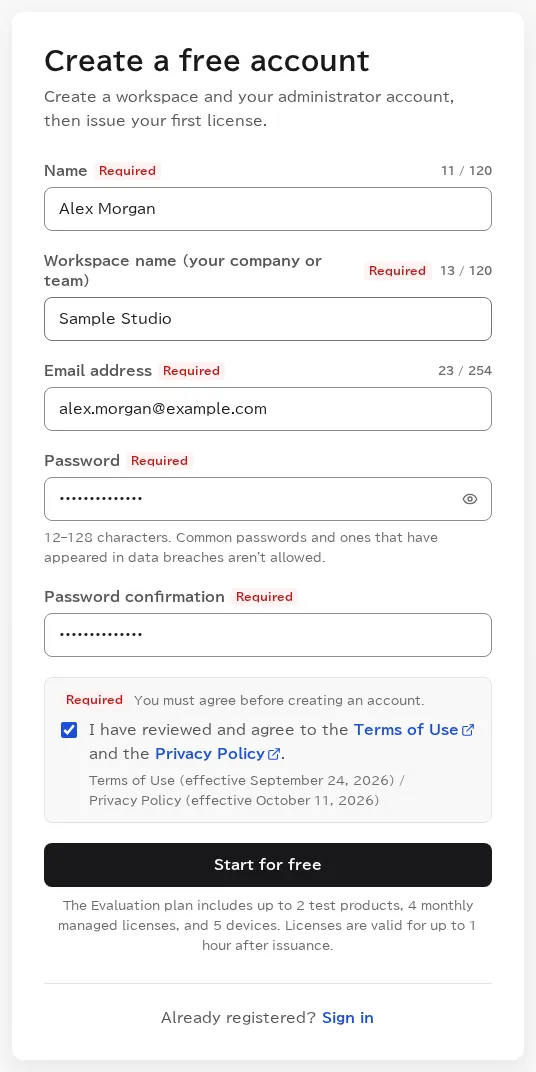
Open the sign-up page from Try it free at the top right of the Usakey site (or Start free on the pricing page). Enter your name, a workspace name (your company or team), your email address, and a password. Review the Terms of Service and the Privacy Policy, check the box to agree, and select Start for free.
Signing up creates one workspace on the Evaluation plan with the name you entered, and makes you its owner.
Confirm your email and sign in
-
Step 2Open the confirmation email
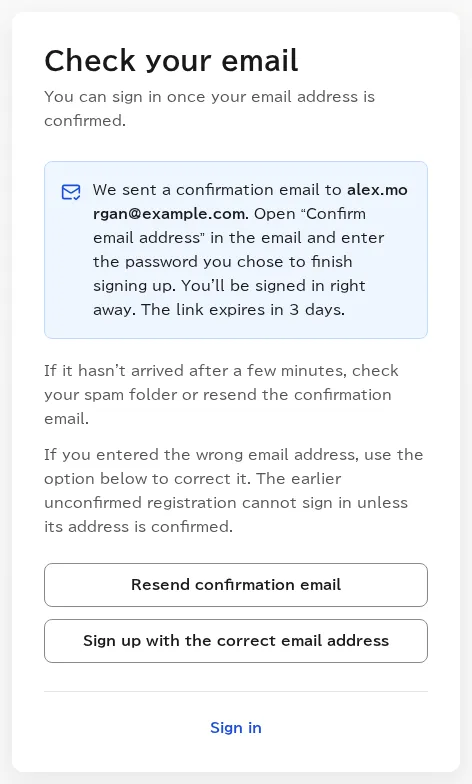
When you see Check your email, open the email we sent and select Confirm email address. On the Finish confirming your email screen, enter the password you chose when you signed up and select Finish confirming. That completes your registration and signs you in. If the email doesn't arrive within a few minutes, check your spam folder or send it again from this page.
-
Step 3Check the setup guide
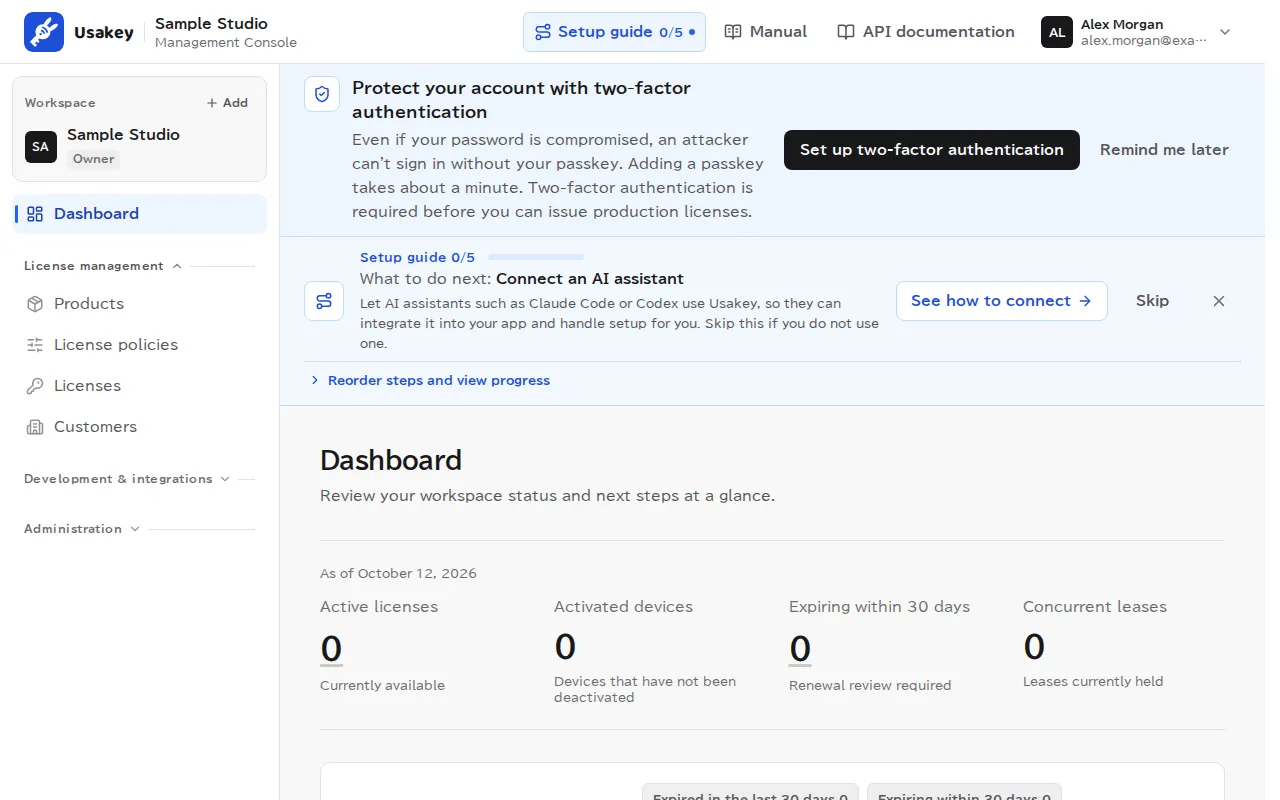
Once your email is confirmed, the Dashboard in the console opens. The setup guide at the top shows what to do next, one step at a time. On this page, you'll create a product, a policy, and a license in that order. Connecting an AI assistant is covered in Add license checks to your app.
You'll also see a suggestion to set up two-factor authentication. With it, a leaked password alone isn't enough to sign in. You must set it up before you issue licenses for a production-environment product.
Add a product
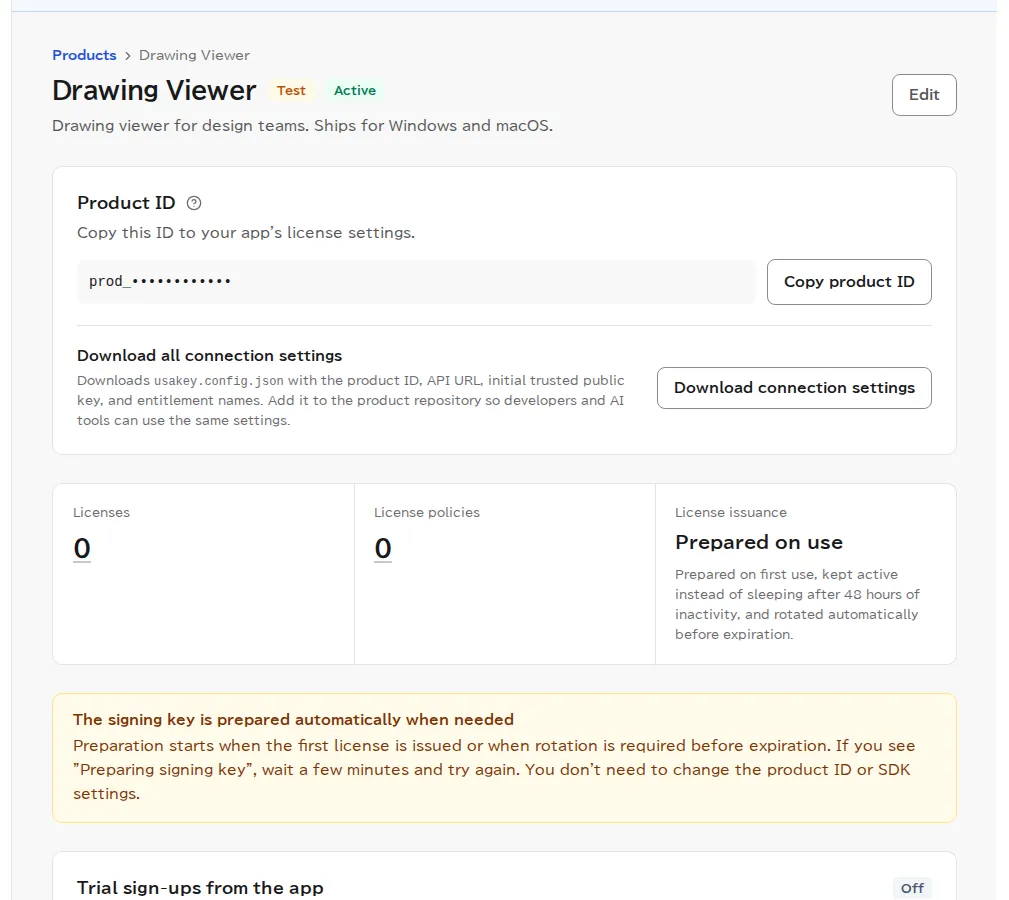
A product is the software you protect with licenses. Each product gets a product ID and its own signing key, and your app uses the product ID to check its licenses.
-
Step 4Enter the product name and environment
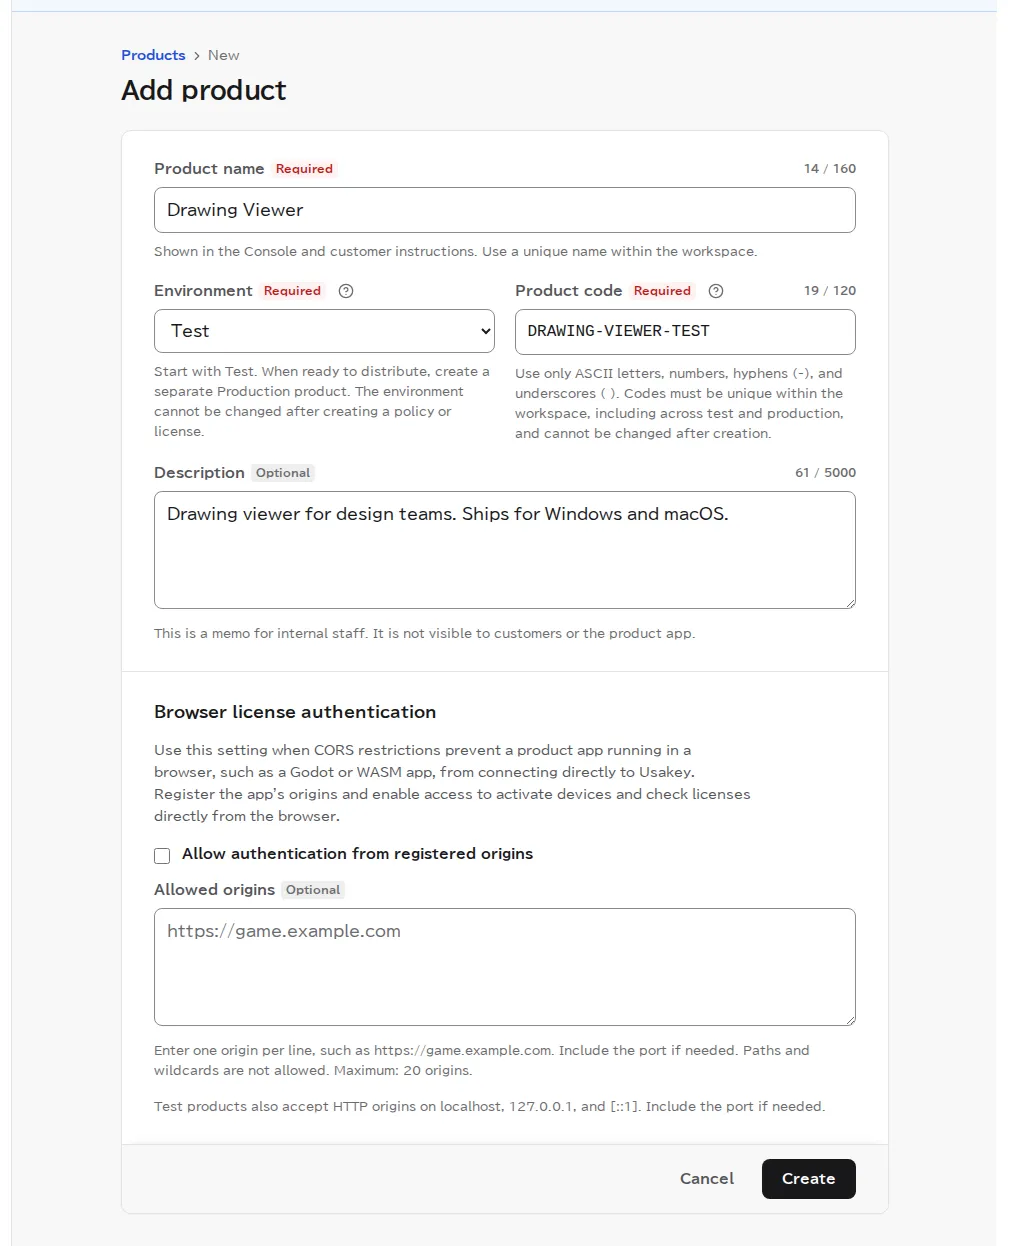
Open Products in the left menu and select Add product. Enter a product name, environment, product code, and description, then select Create.
- Environment: start with Test. Once your app works and you're ready to ship, create a separate production-environment product. You can't change the environment after you create policies or licenses for the product.
- Product code: an internal name made of letters, numbers, hyphens, and underscores. Use different codes for the test and production products.
-
Step 5Find the product ID
Create a policy
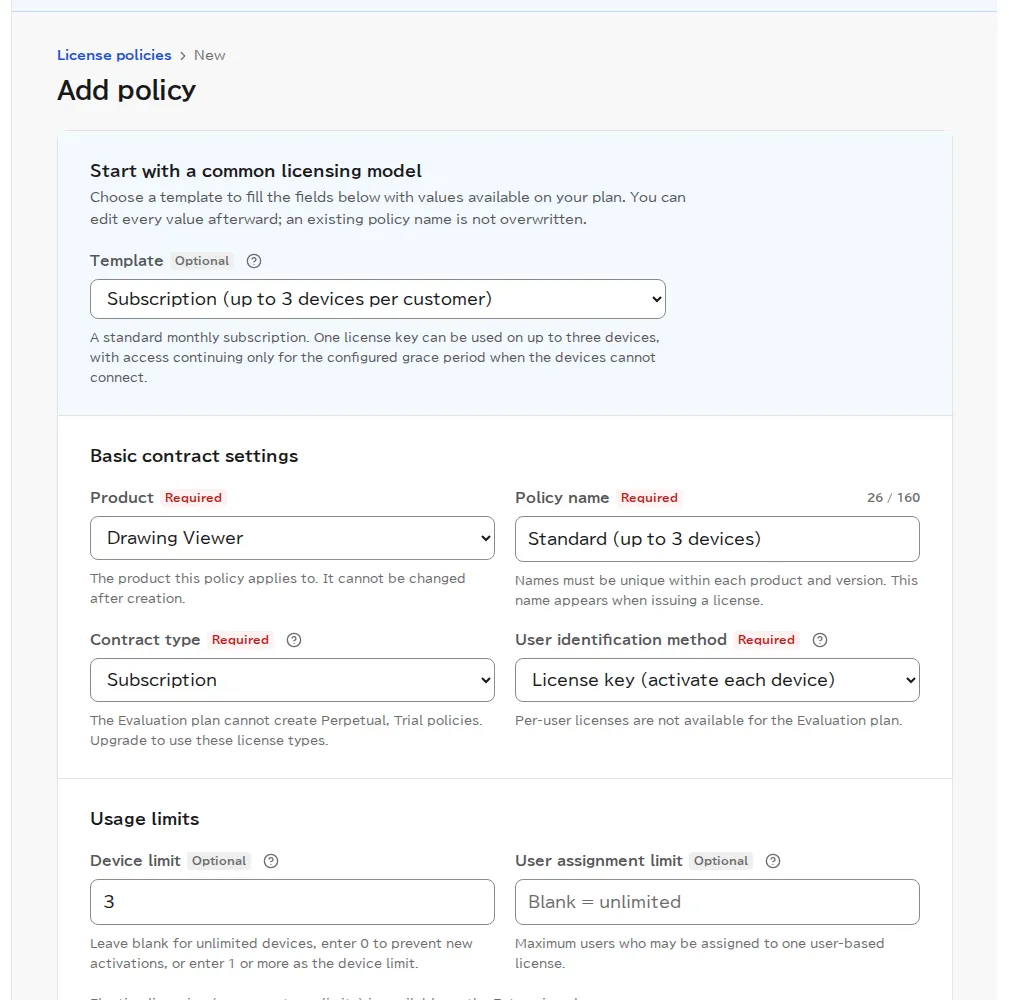
A policy describes how you sell and license the product: the license type, how many devices can use it, what happens when the app can't connect, and which features are included. You can issue any number of licenses from one policy.
-
Step 6Start from a common licensing model
Open License policies in the left menu and select Add policy. Under Start with a common licensing model, choose a Template to fill every field with defaults your plan allows. In this example, you choose a monthly subscription that lets one key run on up to 3 devices, then pick the product and name the policy.
-
Step 7Name the features your app checks
In Features and quantities passed to the product app (JSON), enter the names (entitlements) your app uses to decide whether a feature can be used. For example, to protect PDF export, enter
{"export_pdf": true}, and have your app check the same name (see the integration guide). Then select Create.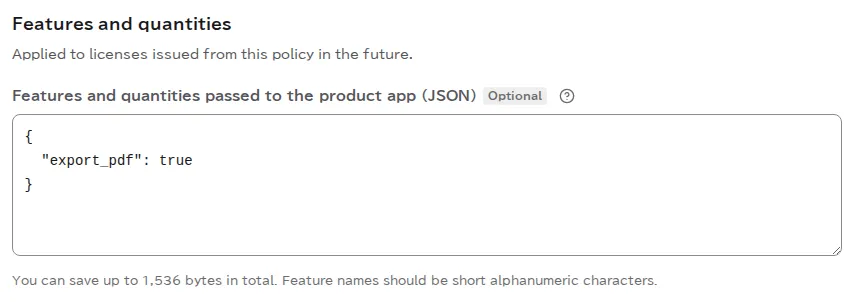
Add a customer (optional)
-
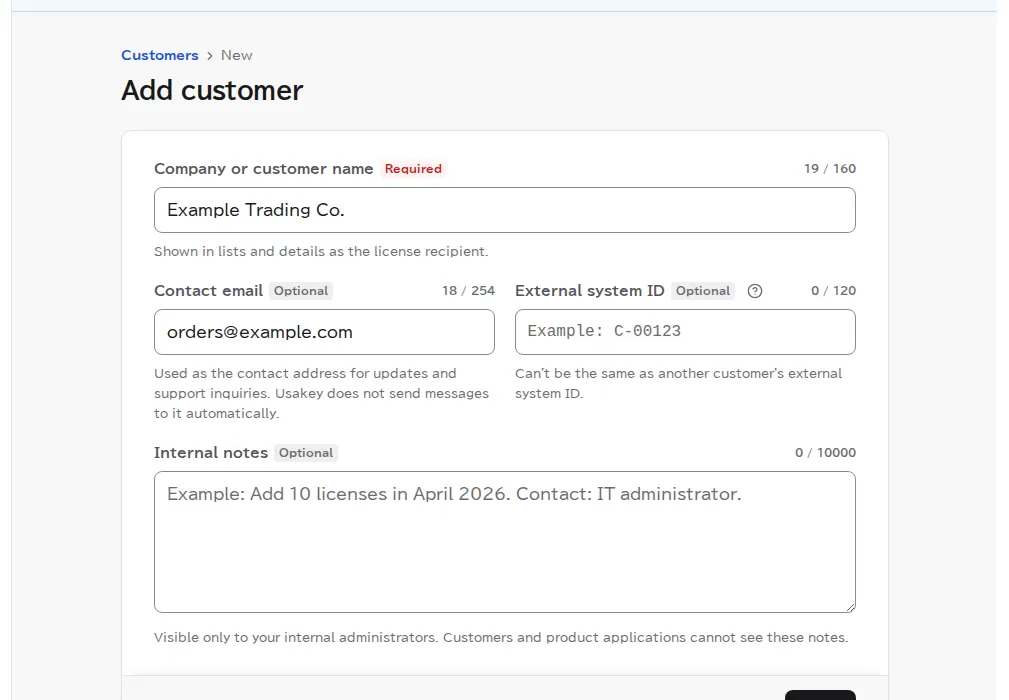
Step 8Add the customer who gets the license
Issue a license
-
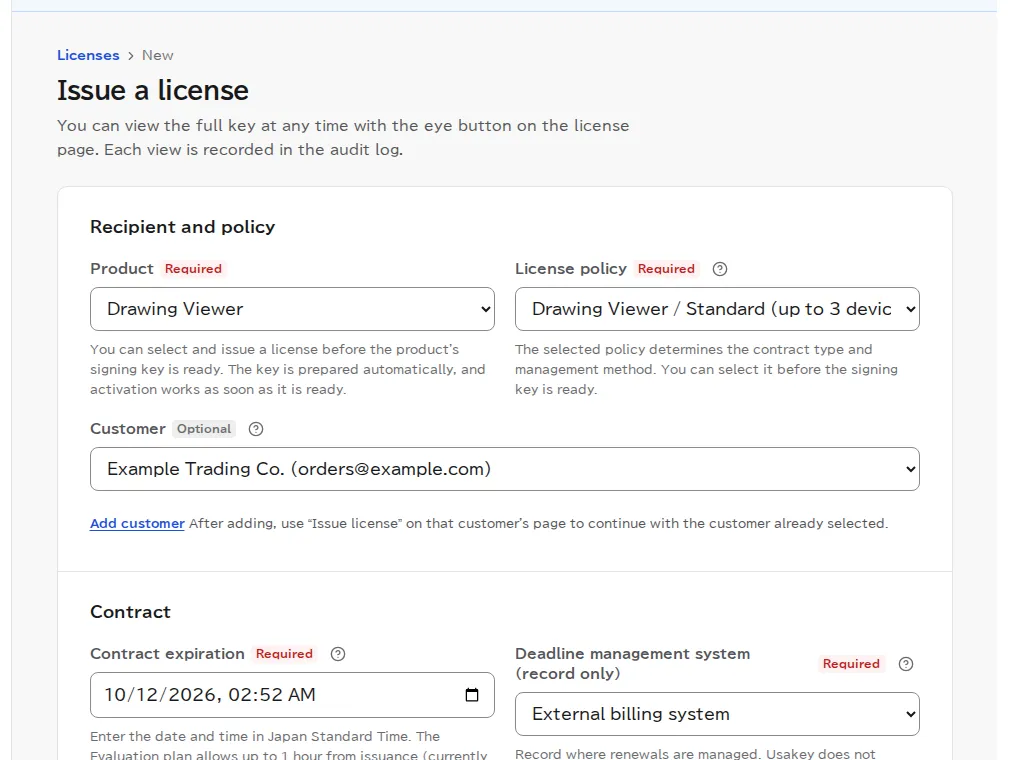
Step 9Choose the product and policy, then issue
-
Step 10Get the license key
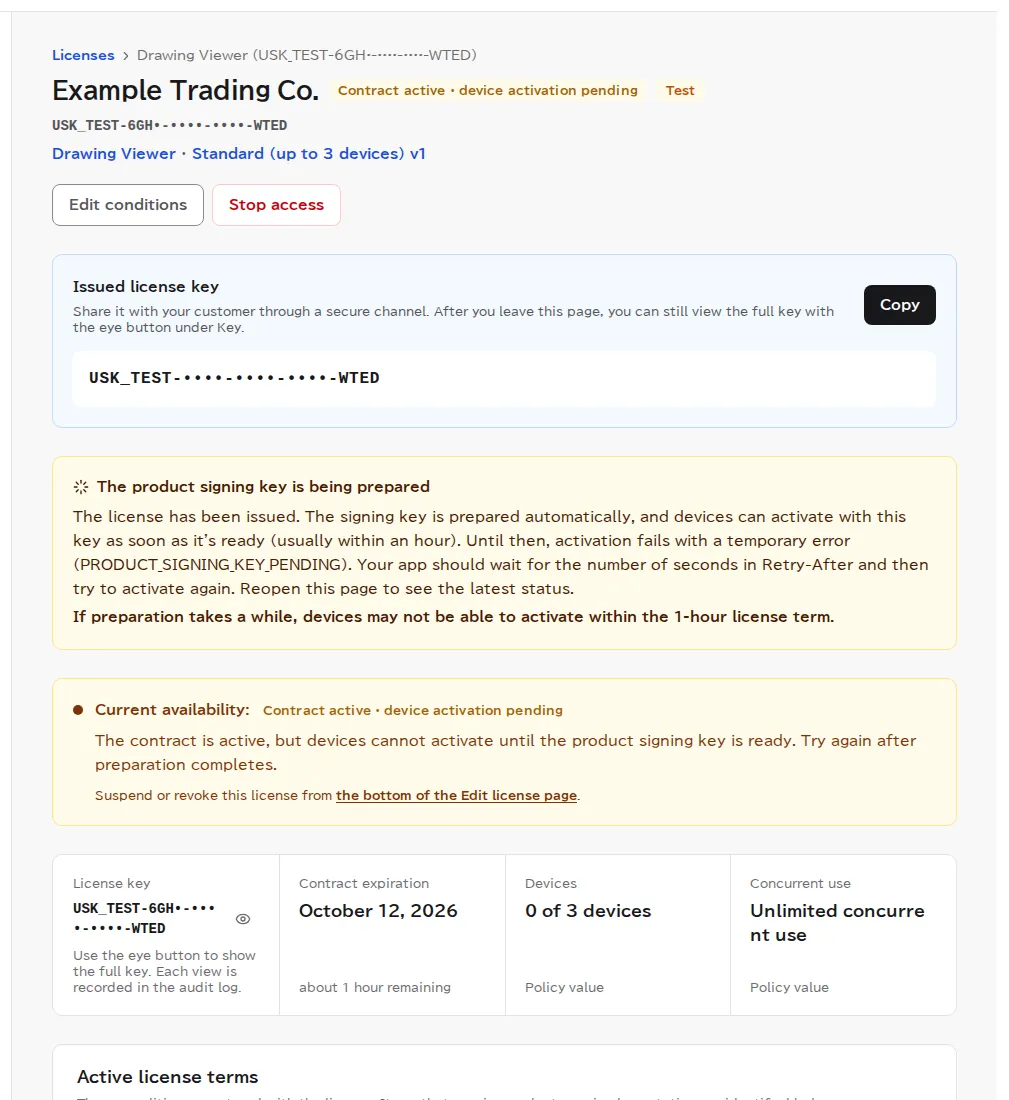
The page shows the Issued license key. Your customer enters this key in your app to activate a device, so send it to them securely. After you leave the page, you can still show the full key with the eye button in the key field. Showing it is recorded in the audit log.
You may see The product signing key is being prepared. Usakey prepares the product's signing key automatically, and devices can be activated with this key as soon as it's ready (usually within an hour).
Next steps
Screenshots were taken in a test environment with sample data. IDs such as product IDs, license keys, and activation tokens are masked. Some details may change as we improve the screens.